Banners are an estimated $864 million industry (see ST, Banner-Usage Survey, November 2003, page 78.). In the sign world, banners offer a relatively quick way to bring in revenue without extensive labor, and to offer a popular product for customers. Banner users know that banners aren’t meant to last forever, but want them to last as long as possible. Proper installation is the key to a banner’s survival, and it’s the best way to stave off a banner’s downfall: Wind.
"Poor installation is the biggest factor in a shortened life of a banner," said Jim McCullough, owner of McCullough Banner Co. (Strasburg, PA).
The specific method for selecting material, attachments and installation plans is often unique to the signmaker or installer, but some general guidelines can be helpful — as well as advice from those in the banner business.
Attachments
Selecting an edge finish and hardware for installation depends on the size and weight of the banner. Exterior banners, typically created from material ranging from 10 to 22 oz., are often finished using folded edges with double-stitched hems (or using banner tape) and grommets spaced approximately every 2 ft. Rope can be threaded through the entire banner length.
Reinforced corners and nylon webbing in the hem can provide added support, said Jay Snyder, owner of Quick Signs (Tustin, CA) and its division, BannersOntime.com. Econo Signs (Oak Lawn, IL) recommends hems, ropes and grommets particularly for banners more than 60 sq. ft.
Advertisement
McCullough suggests using grommets for a utility banner, and adding webbing through the grommets for a more demanding banner. Steel D-rings, similar to seatbelt construction, can also be sewn into the corners. The D-rings can be "sewn into banner ends with reinforced polyester webbing for easy, rope tie-down installation" for smaller banners, according to Econo Signs.
When using ropes for attachment, Prime Signs & Graphics (Farmingdale, NY) recommends pulling and attaching the ropes horizontally and keeping the tension equal in all four corners.
However, rope isn’t the only option. Nick Puleo, president of U.S. Banner Corp. (Greenville, SC), said he’s "big on bungee cords" for banner attachment versus rope. "When tying ropes, I think it’s hard to get the stress to be even. When the load is uneven, it can blow out the banner," Puleo said. Bungee cords help distribute the stress more evenly across a banner, and rope can stretch and sometimes come loose.U.S. Banner Corp.
Al Bolek, owner of Sign Concepts (Addison, IL), uses banners sewn with webbing, not ropes, with grommets every 2 ft. The banner tends to slide from side to side when rope is threaded through it, and webbing holds the banner in place, Bolek said.
A larger banner can act like a sail when it catches the wind, and poles or trees holding a large banner in place have snapped under the wind pressure. A 15- to 20-ft. banner shouldn’t be attached only by its corners. Webbing or ropes threaded through all of the grommets can help even out the pressure.
Against a wall
Advertisement
Some exterior banners are installed flat against a wall. With this type of banner installation, Bolek said the material must be pulled tight to minimize the amount of wind that can get behind it. Using all the grommets, which Snyder recommends be placed every 2 to 2 1/2 ft. (or closer/farther apart depending on expected wind load), can offer added strength. Installers can use pin mounts or put washers and screws directly into the building to attach the banner. But make sure to check with the building owner — and the city — for any regulations regarding drilling or screwing into a wall.
For flat wall installation, Bolek suggests using plastic anchor plugs — which hold well in brick mortar joints and concrete walls — with sheetmetal screws and fender washers or brick shell. If the installer drills a hole, he could hit a hollow spot. So, maintain flexibility on mounting options.
Bolek said that putting an anchor in every grommet for bigger banners adds stability. "If you can’t, it’s a good idea to extend the webbing out 4 to 5 ft. from the banner and tie it to that for added resistance. If there’s too much slack in a banner attachment, it will beat itself to death."
Another option is to mount steel cable on the wall instead of mounting directly on the face. A backplate through the wall would insure a secure tie-off point, according to the Industrial Fabrics Assn. Intl.
For a wall site that will have a permanent rotating collection of banners, stainless-steel eyehooks can be installed in the wall 2 ft. from the edge of the banner, Bolek said. This allows the owner of the building to easily attach new banners without professional assistance.
Across-street banners
Advertisement
For across-street banners, Puleo suggests running metal cables across the road to attach the banner with snap hooks mounted across the top and bottom of the banner’s length. For stability, he recommends also attaching bungee cords in each corner, which attach to poles or buildings on either side of the street. He said 3 x 30 ft. is his maximum size suggested for across a street. "If it’s any bigger, it’s a sail," Puleo said.
Customers often want a bigger across-street banner than recommended. That type of banner need only be as large as the copy, McCullough said.
Most cities have regulations for a banner hung across a street, Snyder said. Often, permanent guide wires are already installed for changing banner installations along a busy street. He recommends professional installation for across-street banners or those in a potentially windy location. For simple, small banners, some can be installed by the end-user armed with instructions. Pole-installed banners
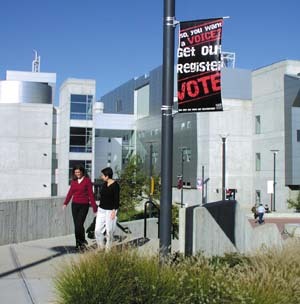
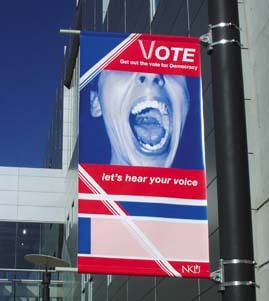
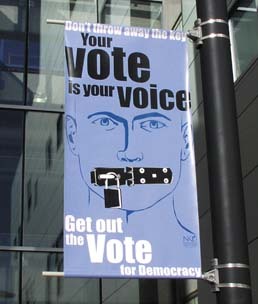
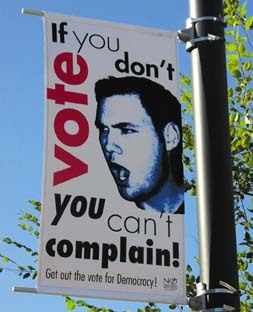
Pole pockets, which create a space to secure the banner over a rod, can be used for banners on street poles or lamp posts, Puleo said. He recommends a maximum of 2 1/2- to 3-ft. long banners. Instead of rope, pole-installed banners can be attached via brackets on the poles or by fastening bands around the pole.
Interior installation
Interior banners don’t have to contend with wind or the weather. These banners are often viewed from a closer distance than exterior banners, so the lettering or printing on the material may be more detailed. Installation influences how the banner is finished after decoration. Quick Signs said options include raw banner material (with no hem or grommets), single-folded taped edges, and a single-folded, double-stitched hem with grommets.
Wall mounting can include wood screws through washers and grommets, screw-in anchors, molly bolts or toggle bolts. Additional temporary indoor banners can be installed with a hook-and-loop Velcro


 Tip Sheet1 week ago
 Photo Gallery2 days ago
 Ask Signs of the Times4 days ago
 Real Deal1 week ago
 Benchmarks7 days ago
 Women in Signs1 week ago
 Photo Gallery1 week ago
 Women in Signs1 week ago