3 Top Tips For Vehicle Wrapping
Helpful hacks for handling the hard stuff.
TOP TIPS OR “hacks” provide excellent solutions for wrapping a vehicle’s most difficult elements. Whether it’s a car, truck, boat or anything else that can be wrapped, it’s likely to present recessed areas, headlights or other unavoidable obstacles. We asked some of the nation’s best wrap instructors to share a top tip with you and received super-helpful hacks from these three top trainers:
- Louie Calma, technical sales specialist – West, Arlon Graphics (Placentia, CA) and member of the WRAPITRIGHT team of wrap trainers
- Rob Ivers, owner/vinyl graphics consultant, Rob Ivers Inc. (Raymore, MO), member of the Board of Directors of the PDAA Inc., and author of The Graphic Installers Handbook (ST Books), and
- Dallas Fowler, co-owner, Digital EFX Wraps (Louisville, KY) and trainer for Roland DGA Corp.’s “Born to Wrap” workshops.
Shifting Tension Over Deep Channels By Louie Calma
When it comes to fleet and commercial-vehicle graphics, applying over deep channels is one of the top concerns. I’m talking about the inset “windows” that are found on cargo vans like Sprinters, Nissan NVs, and Ford Transits.
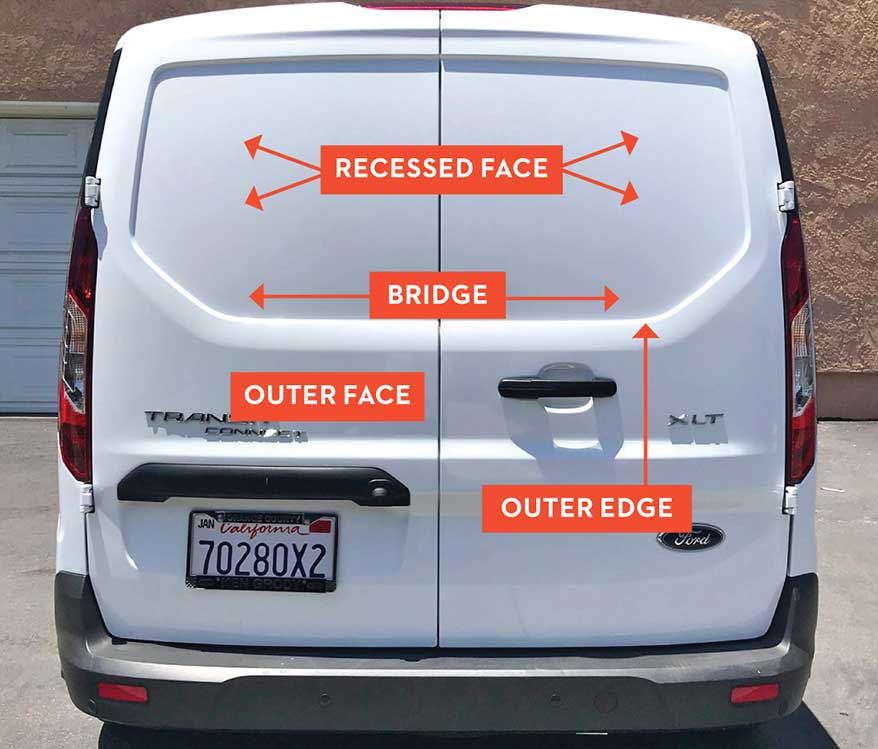
Before we go further, let’s identify these four terms: the outer face, outer edge, recessed face and the bridge (see image below).
Step 1: Apply the graphics on the outer face of the window and bridge the film over the deep channel. The amount of bridged film may depend on the depth of the channel, but there should be a minimum of 4 in. I prefer to float the film over the entire window if possible.
Step 2: Adhesive promoter could help but it can cause removal issues. Also, if the film is not properly stretched over the channel, it can pop and crack the film over time. The key to a durable application is to move the tension away from the deepest part of the channel.
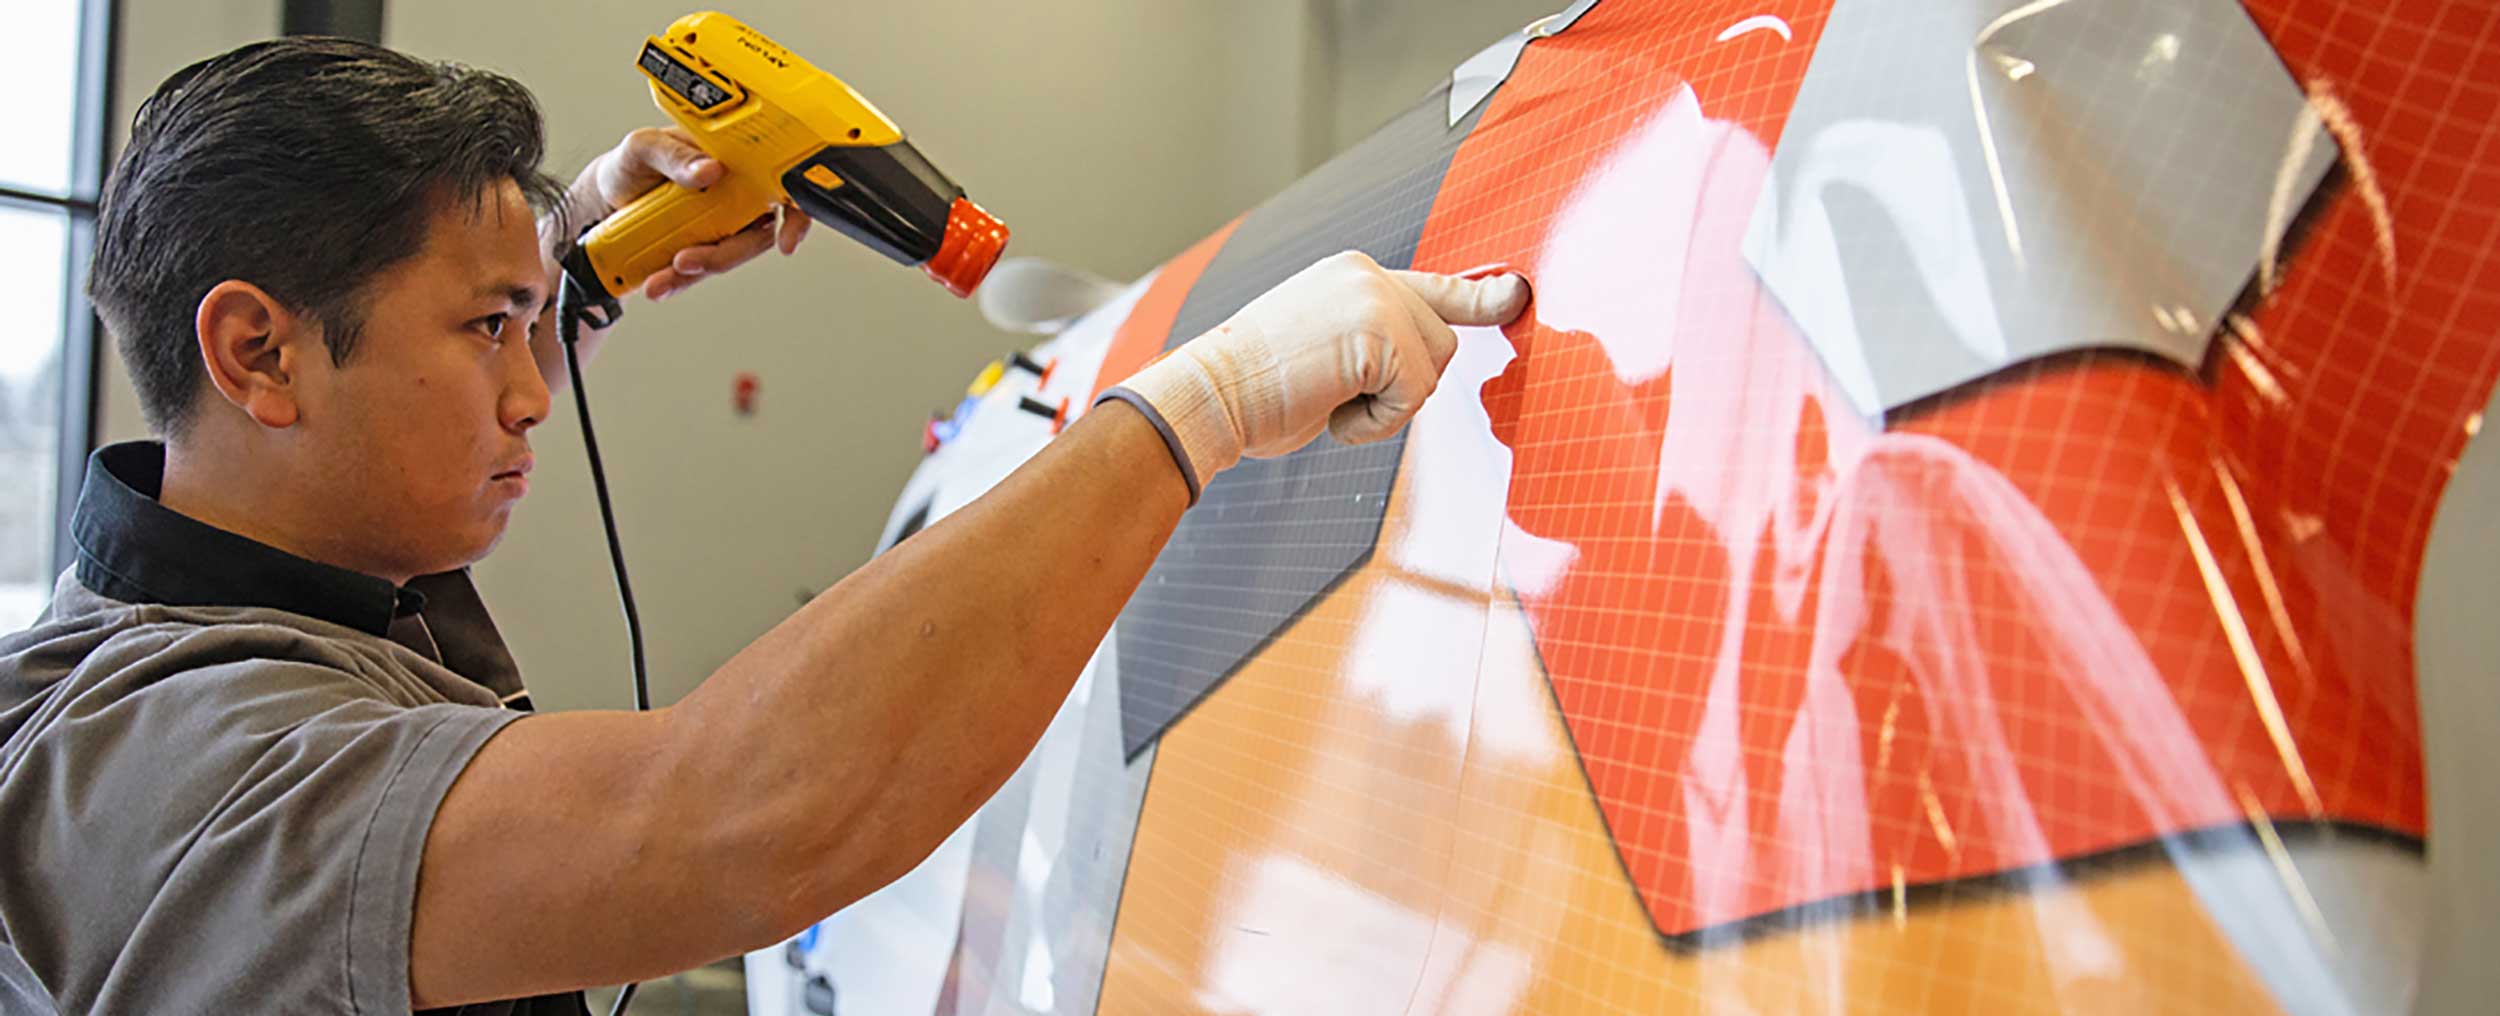
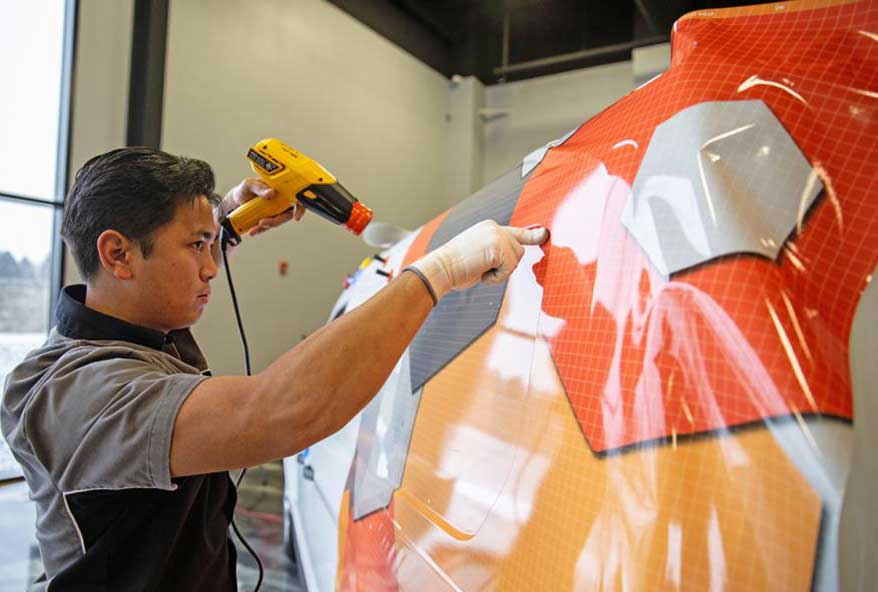
Step 3: With an application glove, run your finger along the window’s outer edge to define the edge. Apply heat on the section of the bridged film away from the channel and install the cold section. The angle of the heat gun is critical. Above, I’m aiming the heat gun upwards as I install the bottom portion so the hot air points away from the channel.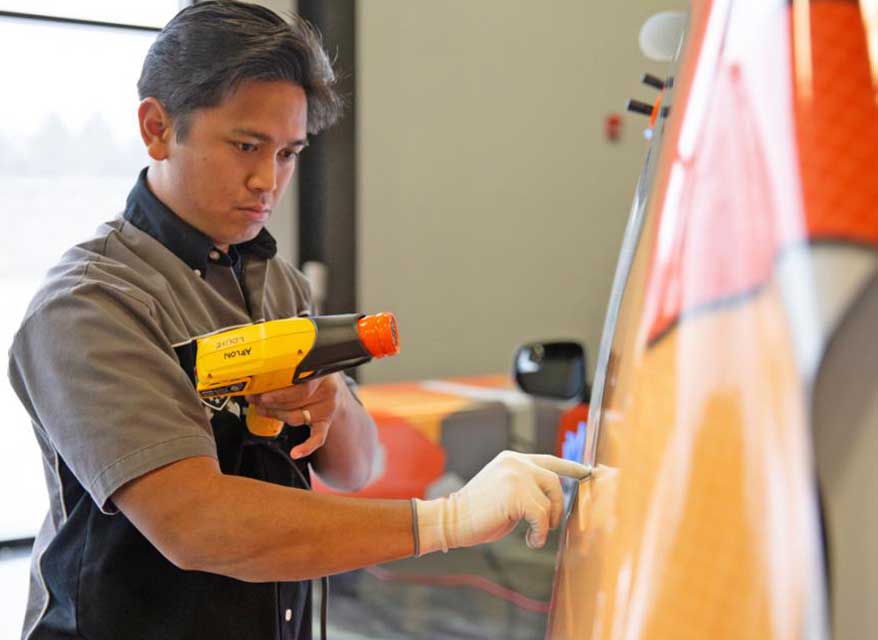
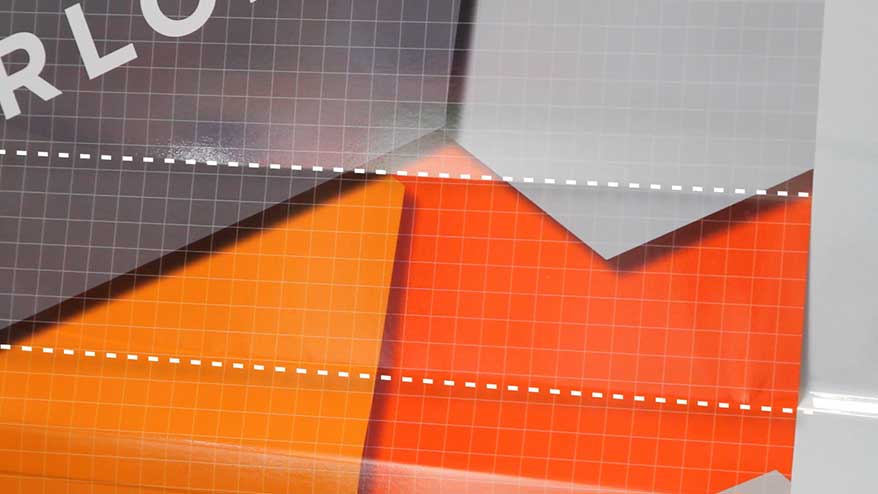
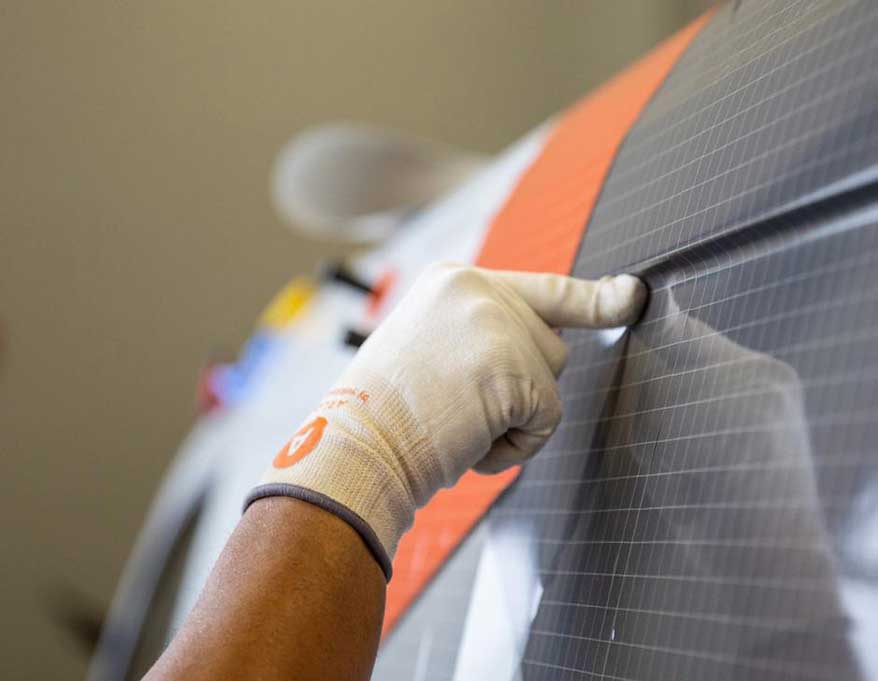
Step 4: Drop the bridge in 1/8-in. increments. Installing this area will take multiple passes and requires depth control. Pinch your thumb and index finger together to maintain a consistent depth along the channel. (For practice purposes, we printed a 1/2 x 1/2-in. grid on the graphic so that stretched areas are more visible.)
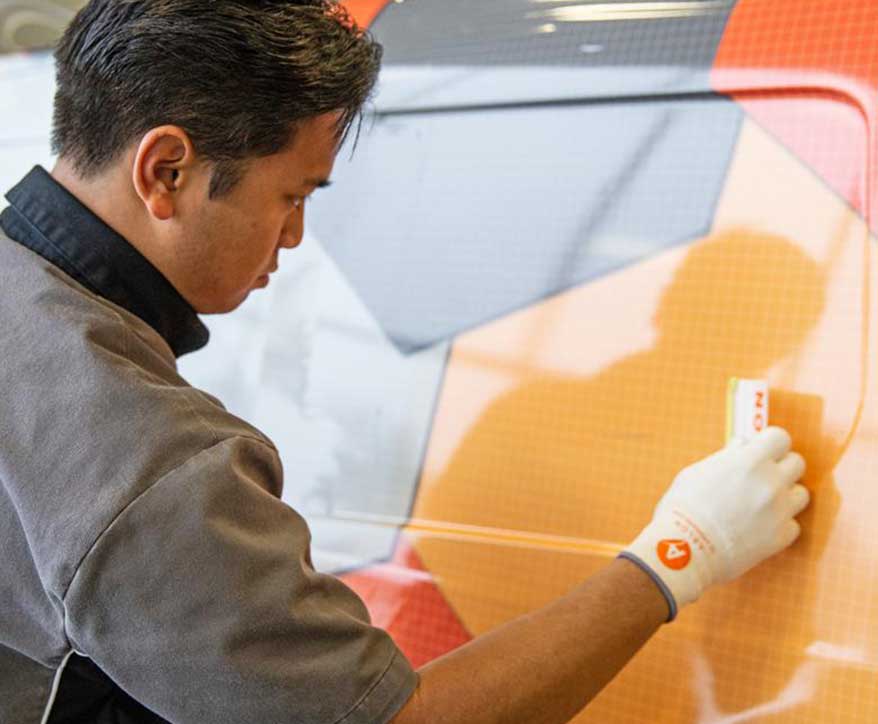
Step 5: I recommend working the channels in 1-ft. sections. Applying the entire length of the channel may leave a large trapped bubble in the flat area. When the film has reached the deepest part of the channel, push the air out of the flat area and repeat the previous steps to work on your next 1-ft. section. Finally, don’t forget to post-heat.
The Headlight Hack By Rob Ivers
This technique – which I created for an online tutorial – is especially helpful when trimming the vinyl along the headlight itself would not leave enough vinyl to hide all the paint around the headlight.
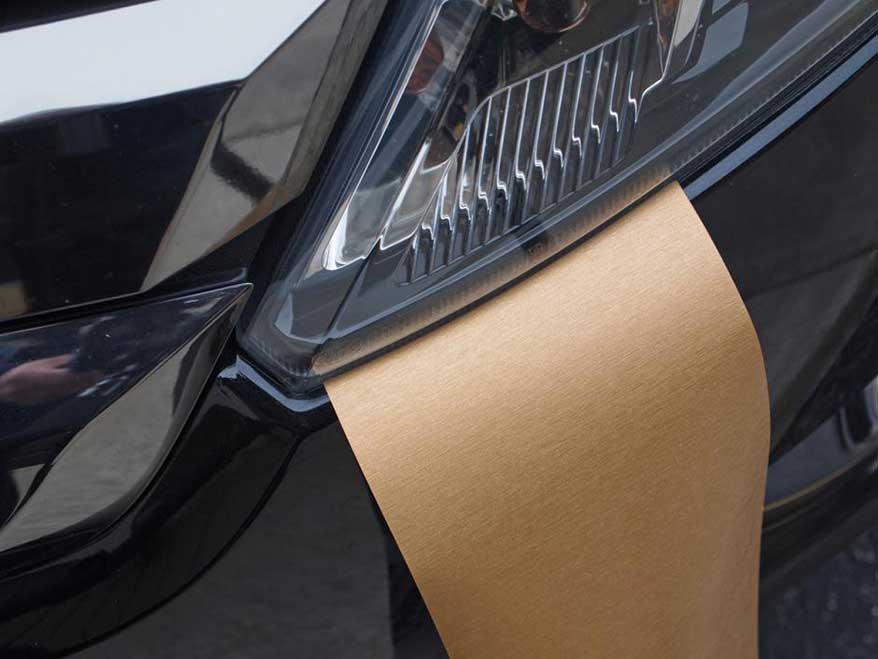
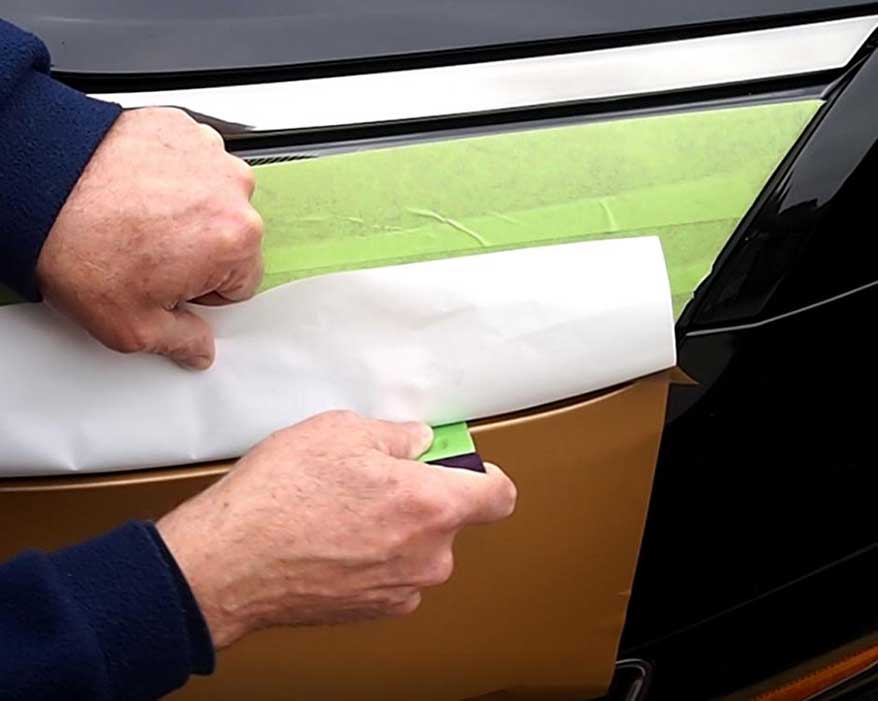
If you can easily remove the lights, do that for sure, but if they are difficult or time-consuming to remove – and they usually are on most modern vehicles – try using the liner as a tucking tool.
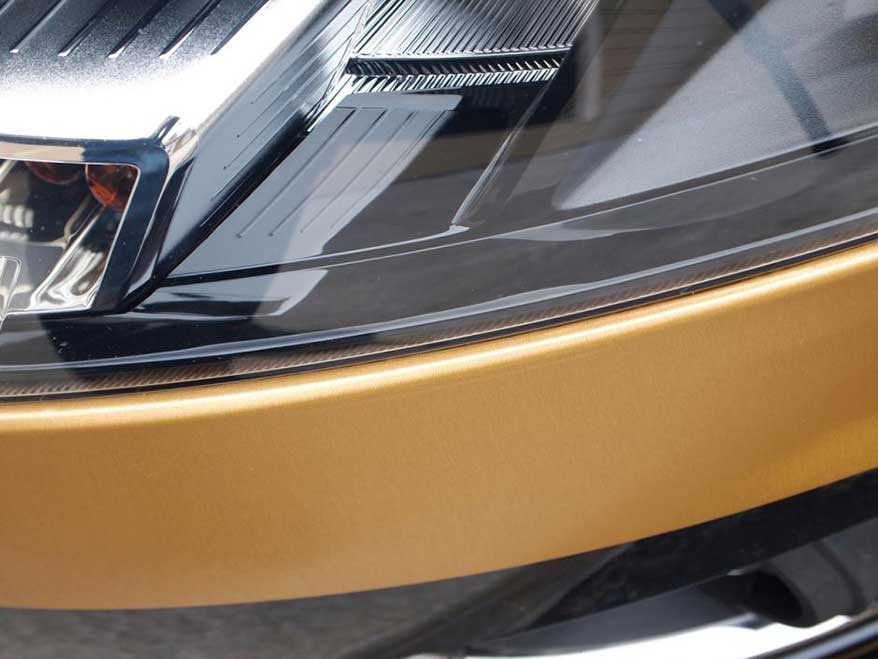
Look closely at the second photo and you can you see that almost ½ in. of the gold vinyl shows through the bottom of the headlight. Normally, installers will trim along the underside of the light and tuck in the vinyl that is left. The amount of vinyl available to tuck is equal to the gap between the bumper and the bottom of the headlight. In this case, it was only 1/8 in., but ½ in. was needed.
In order to cover all the black paint, the ½ in. of extra vinyl needs to do three things: be trimmed to the right shape, squeeze through the ½-in. gap without sticking to the light, and stay clean on its adhesive side.
Advertisement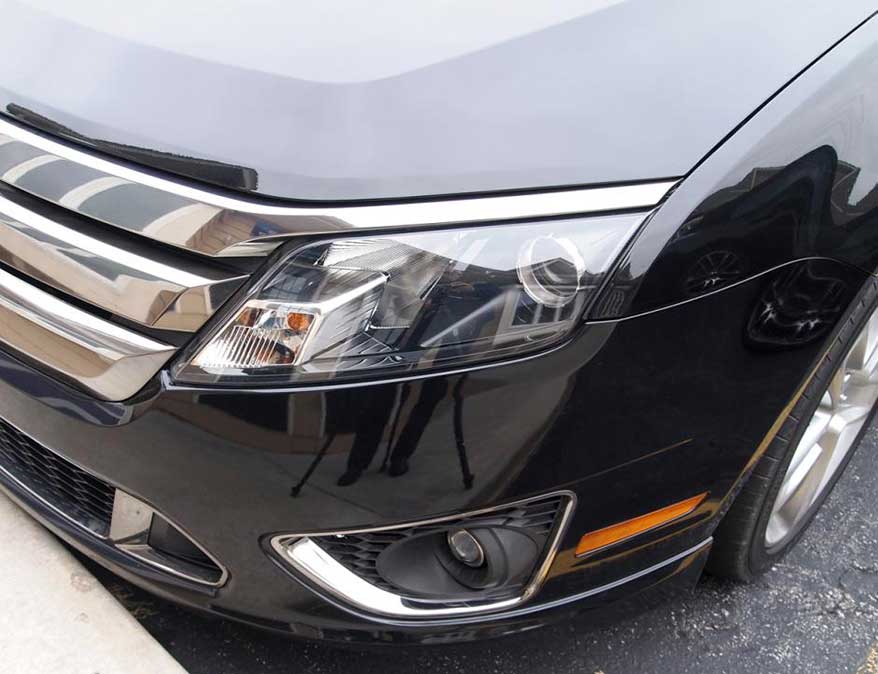
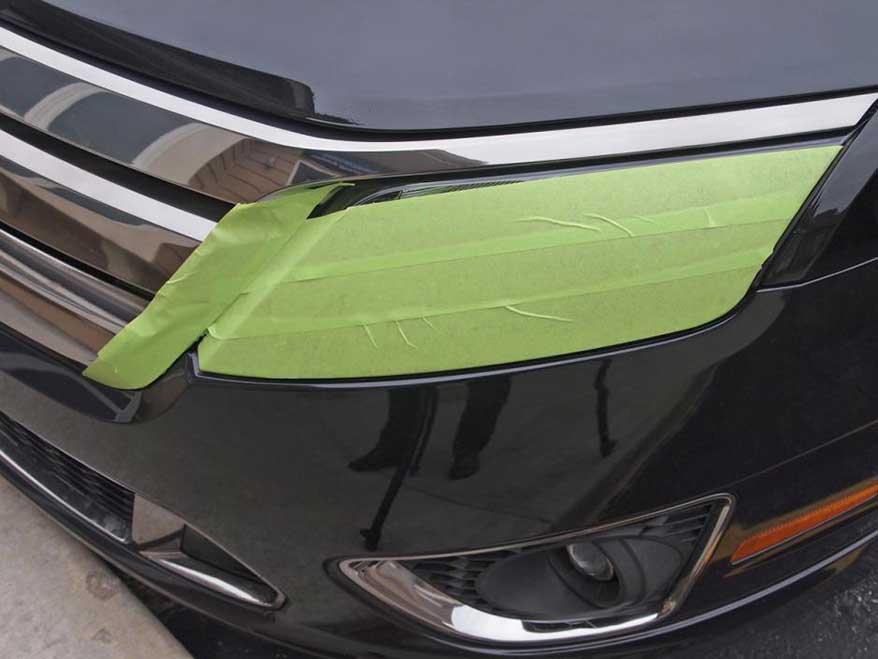
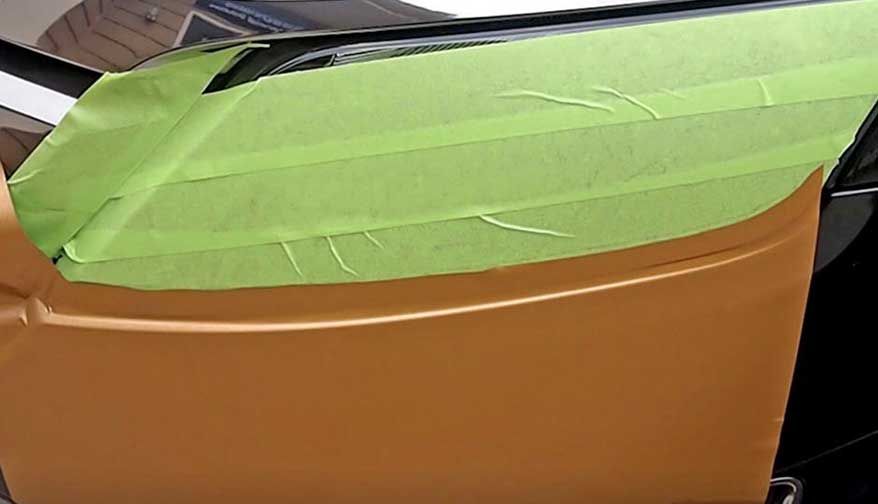
Check the gap around the headlights. A Ford Fusion is a perfect example of when to use this hack.
Note the gold showing through the clear lens at the bottom of the light.
Step 1: Apply masking or application tape to the headlight. The tape keeps the adhesive clean, lets the vinyl lift without stretching and also helps protect the light from scratches while the vinyl is being trimmed.
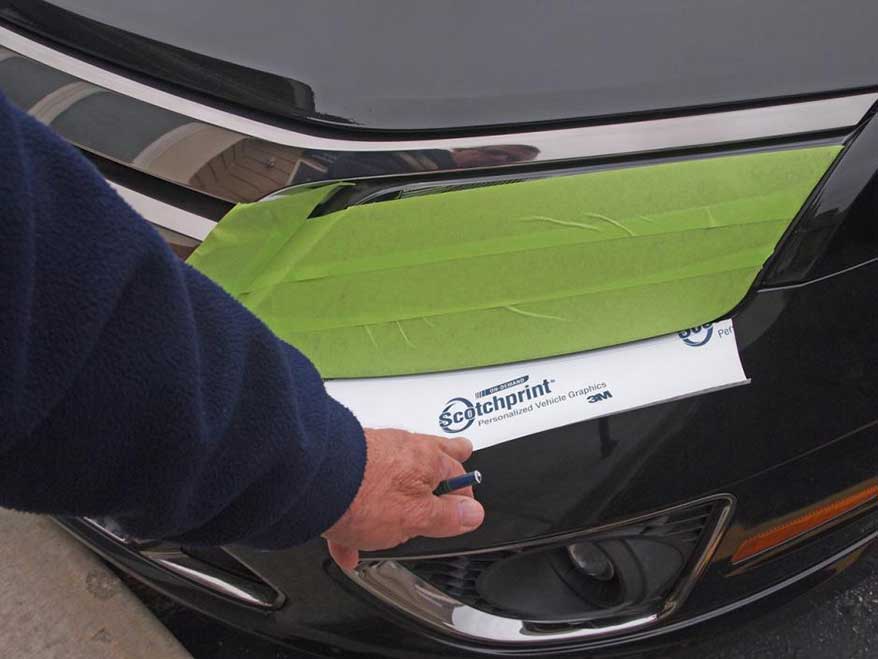
Step 2: Slide the liner under the light to see if it fits. If not, trim it to the shape of the light. Mark the liner following the curve of the light; I used a blue pencil. Remove the liner and trim along the line.
Step 3: Apply the vinyl, being cautious not to stretch it.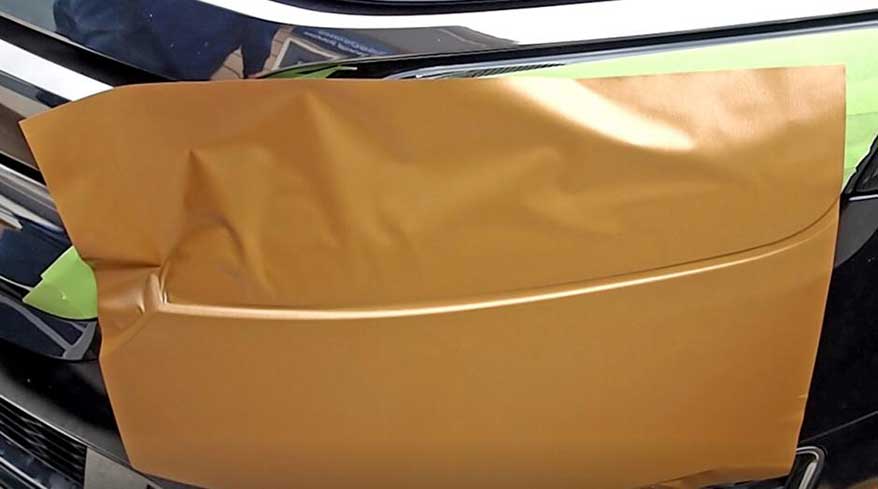
Step 4: Trim away the excess, parallel to the shape of the light, leaving the 1/2-in. extra vinyl needed to tuck under.
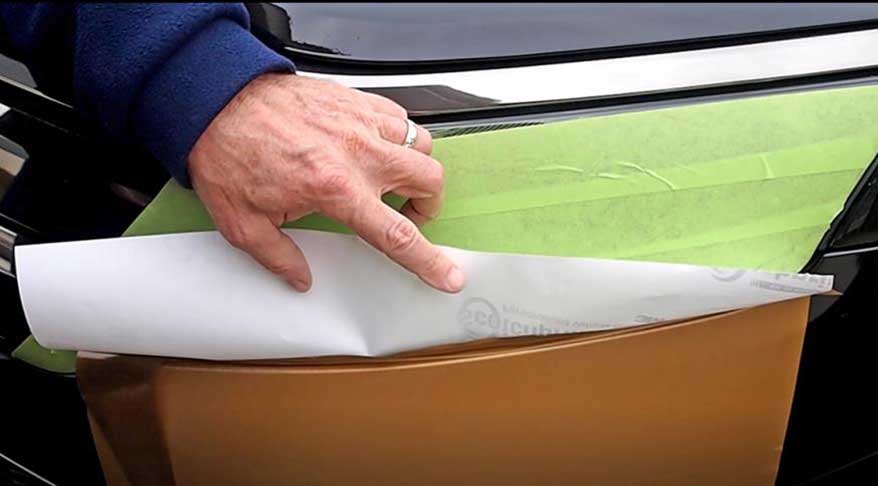
Step 5: Gently fold the extra 1/2 in. of vinyl out of the way while you start sliding the liner into place with your other hand. Be sure the silicone side of the liner is facing the vinyl!
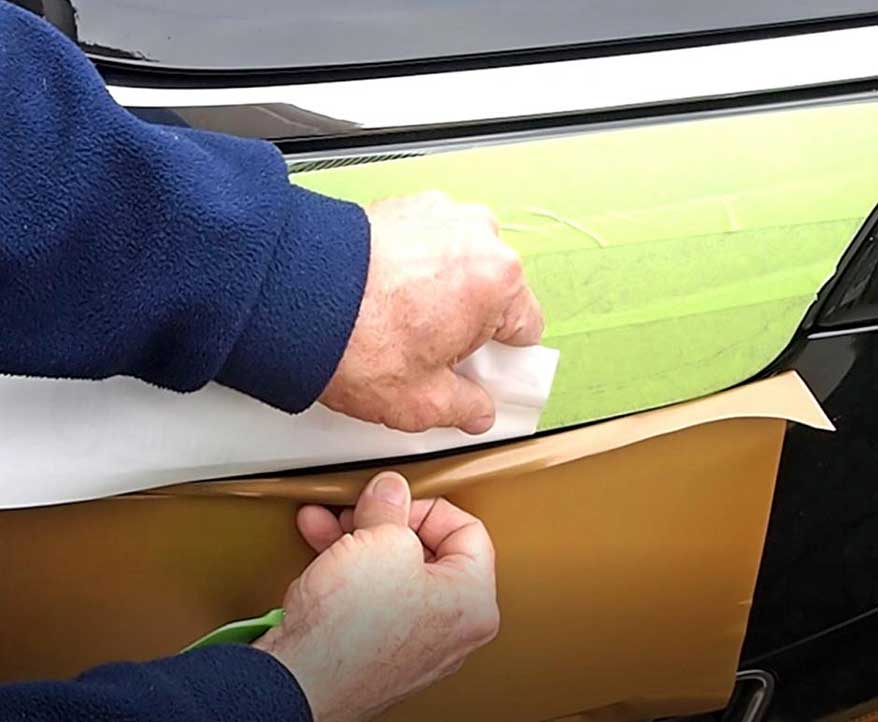
Step 6: Continue sliding the liner until it is all the way in.
Step 7: Carefully squeegee the vinyl. It should slip off the liner, through the gap and onto the paint under the light.
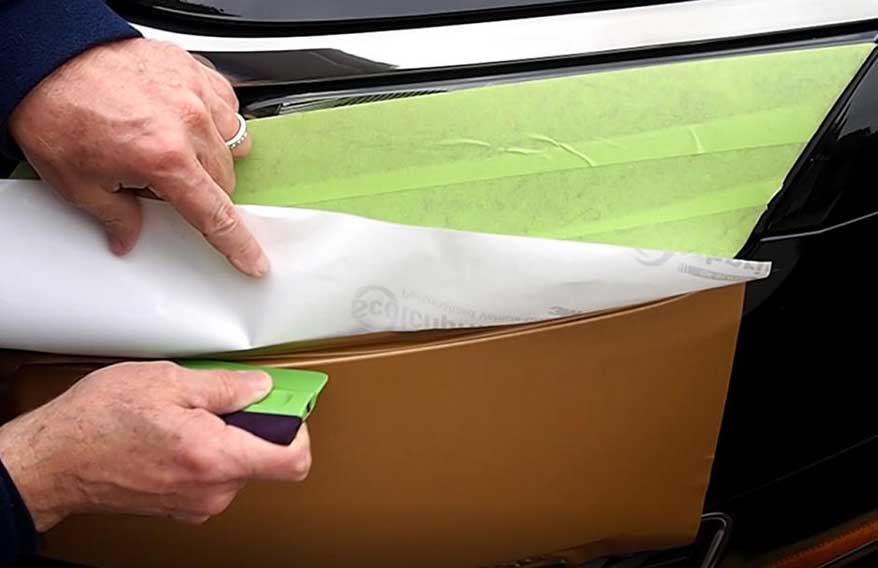
Step 8: Continue tucking the vinyl across the bottom of the light. Be sure to go back one more time with the squeegee to make sure all edges are well-adhered.
Step 9: Remove all the tape and check out what may be the best looking headlight you ever did!
Template Your Way Through Stressful Wraps By Dallas Fowler
Using templates takes the stress away from wrapping over obstacles – from both you and the vinyl. For many years, I would tackle a wrap project head-on, even if it meant freestyling over door handles, hinges and other obstacles. Now, I always wrap smarter and try to install the vinyl with the least amount of stress and stretch, so it will last longer.
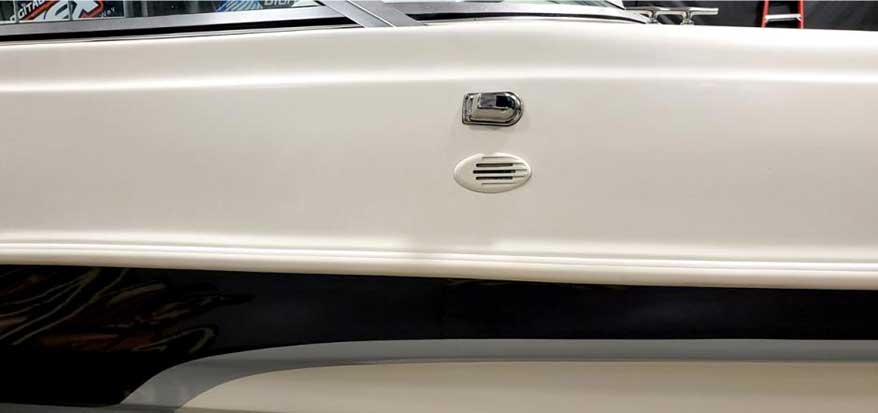
Lights and vents found on boats are common obstacles that benefit from templates, as opposed to my old approach of heating, stretching and relief cuts. We can avoid this problem simply by spending more time on the setup of our piece, making a template and pre-cutting the wrap in advance. You can make a solid template with blue painter’s tape.
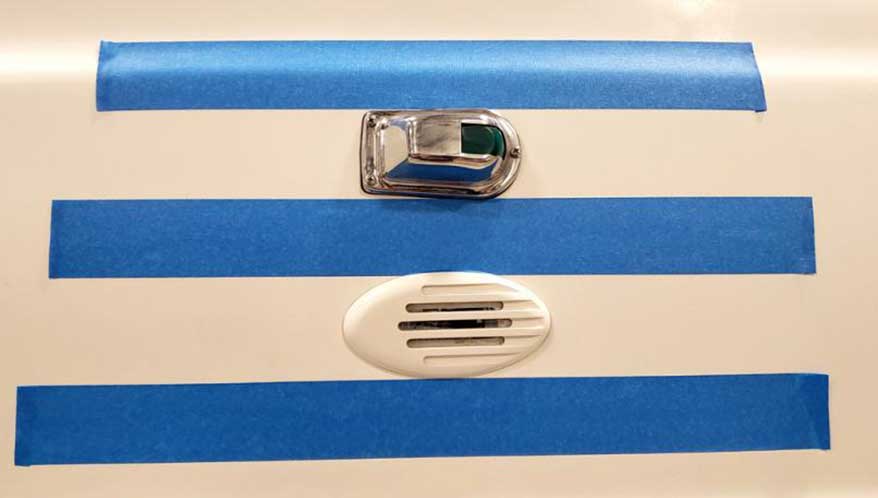
Step 1: Start by making a top and bottom base with 2-in. tape.
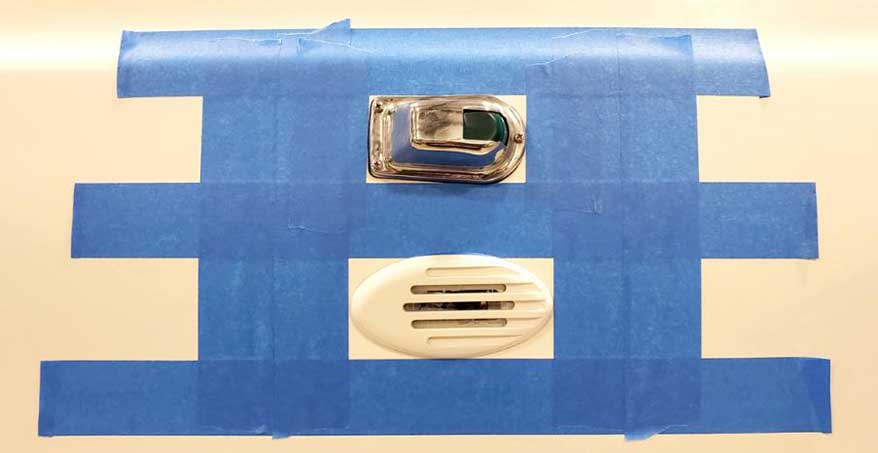
Step 2: Add the vertical pieces and lay them directly on the edge of each obstacle you are going to trace.
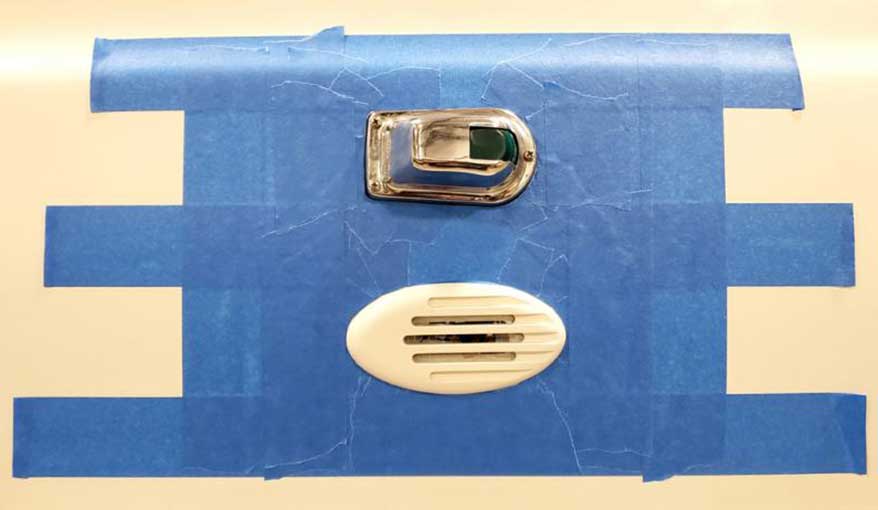
Step 3: Add smaller pieces of tape until you have the entire shape outlined with blue tape. It’s like making a cast template around the obstacle you need to trace.
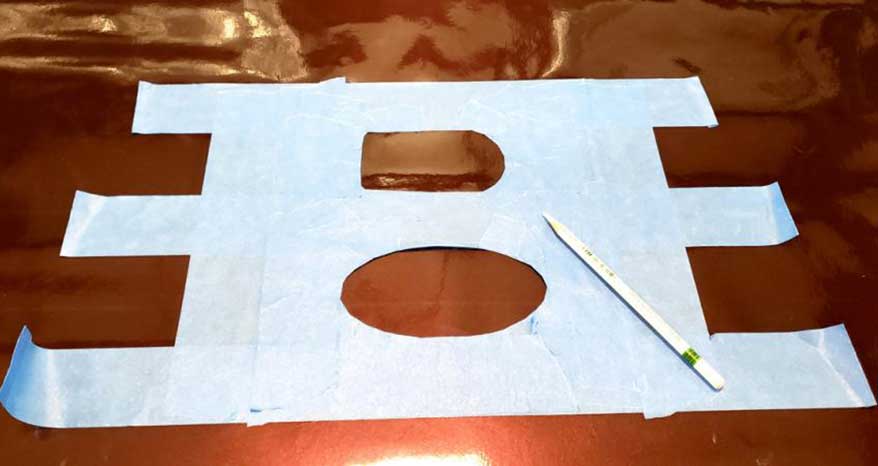
Step 4: Remove the template and take it to the table. Apply it to your vinyl once you have the exact area where the template will go on your wrap.

Step 5: Use a grease pencil to trace the template onto the wrap. Remove the template and cut it out about 1/8 in. inside the line to allow for some play and a much tighter fit around the base of the obstacle.
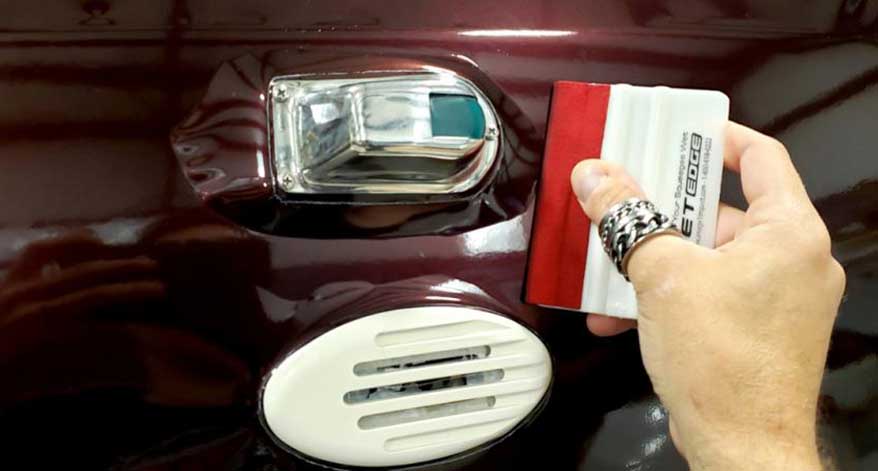
Step 6: Apply the wrap as usual. You should now be able to slide over the obstacles with no tension or glue lines. This helps vinyl longevity and appearance. Trim off excess vinyl around the base, but do not cut the on surface. Use the bottom side of the obstacle to trim off excess vinyl.
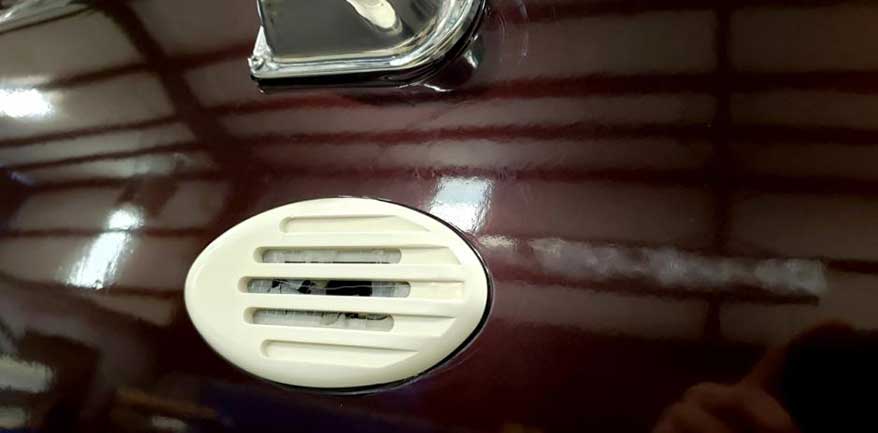
Notice, no glue lines or stress around the edges.
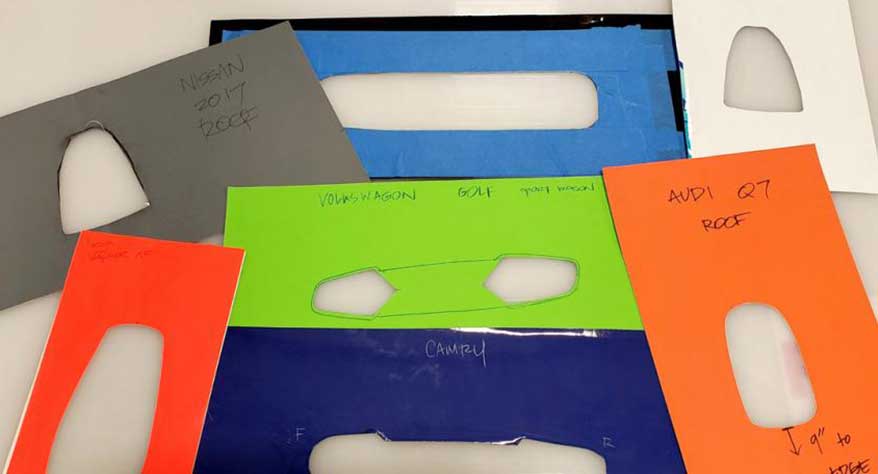
Using templates in certain situations will help speed up installation time as well as improve the overall quality. You can even make paper copies and label them for future use.
Introducing the Sign Industry Podcast
The Sign Industry Podcast is a platform for every sign person out there — from the old-timers who bent neon and hand-lettered boats to those venturing into new technologies — we want to get their stories out for everyone to hear. Come join us and listen to stories, learn tricks or techniques, and get insights of what’s to come. We are the world’s second oldest profession. The folks who started the world’s oldest profession needed a sign.


INX Promotes Three to Vice President

6 Sports Venue Signs Deserving a Standing Ovation

Hiring Practices and Roles for Women in Sign Companies


Bulletins
Get the most important news and business ideas from Signs of the Times magazine's news bulletin.
-

 Tip Sheet3 days ago
Always Brand Yourself and Wear Fewer Hats — Two of April’s Sign Tips
-

 Business Management2 weeks ago
When Should Sign Companies Hire Salespeople or Fire Customers?
-

 Women in Signs2 weeks ago
2024 Women in Signs Award Winners Excel in Diverse Roles
-

 Real Deal4 days ago
A Woman Sign Company Owner Confronts a Sexist Wholesaler
-

 Editor's Note1 week ago
Why We Still Need the Women in Signs Award
-
 Benchmarks12 hours ago
6 Sports Venue Signs Deserving a Standing Ovation
-

 Line Time2 weeks ago
One Less Thing to Do for Sign Customers
-
 Product Buying + Technology1 week ago
ADA Signs and More Uses for Engraving Machines